There’s nothing worse than wasting time and money, so is there any benefit to reviewing the data you store? Well, unless you want to be like the kid who never studies for tests, regular audits may be the only thing keeping you out of the principal’s office.
To Audit or Not to Audit?
By this point, I would hope none of us are hearing about in-house data audits for the first time. So the real question is whether investing in a sensitive data discovery tool is worth the money, or are you better off simply auditing your stored data whenever it’s convenient?
To some extent, the answer is different for everyone. Assuming you run a small mom-and-pop shop, investing in data auditing software for processes you could probably do just sitting at the family computer may not be the best choice.
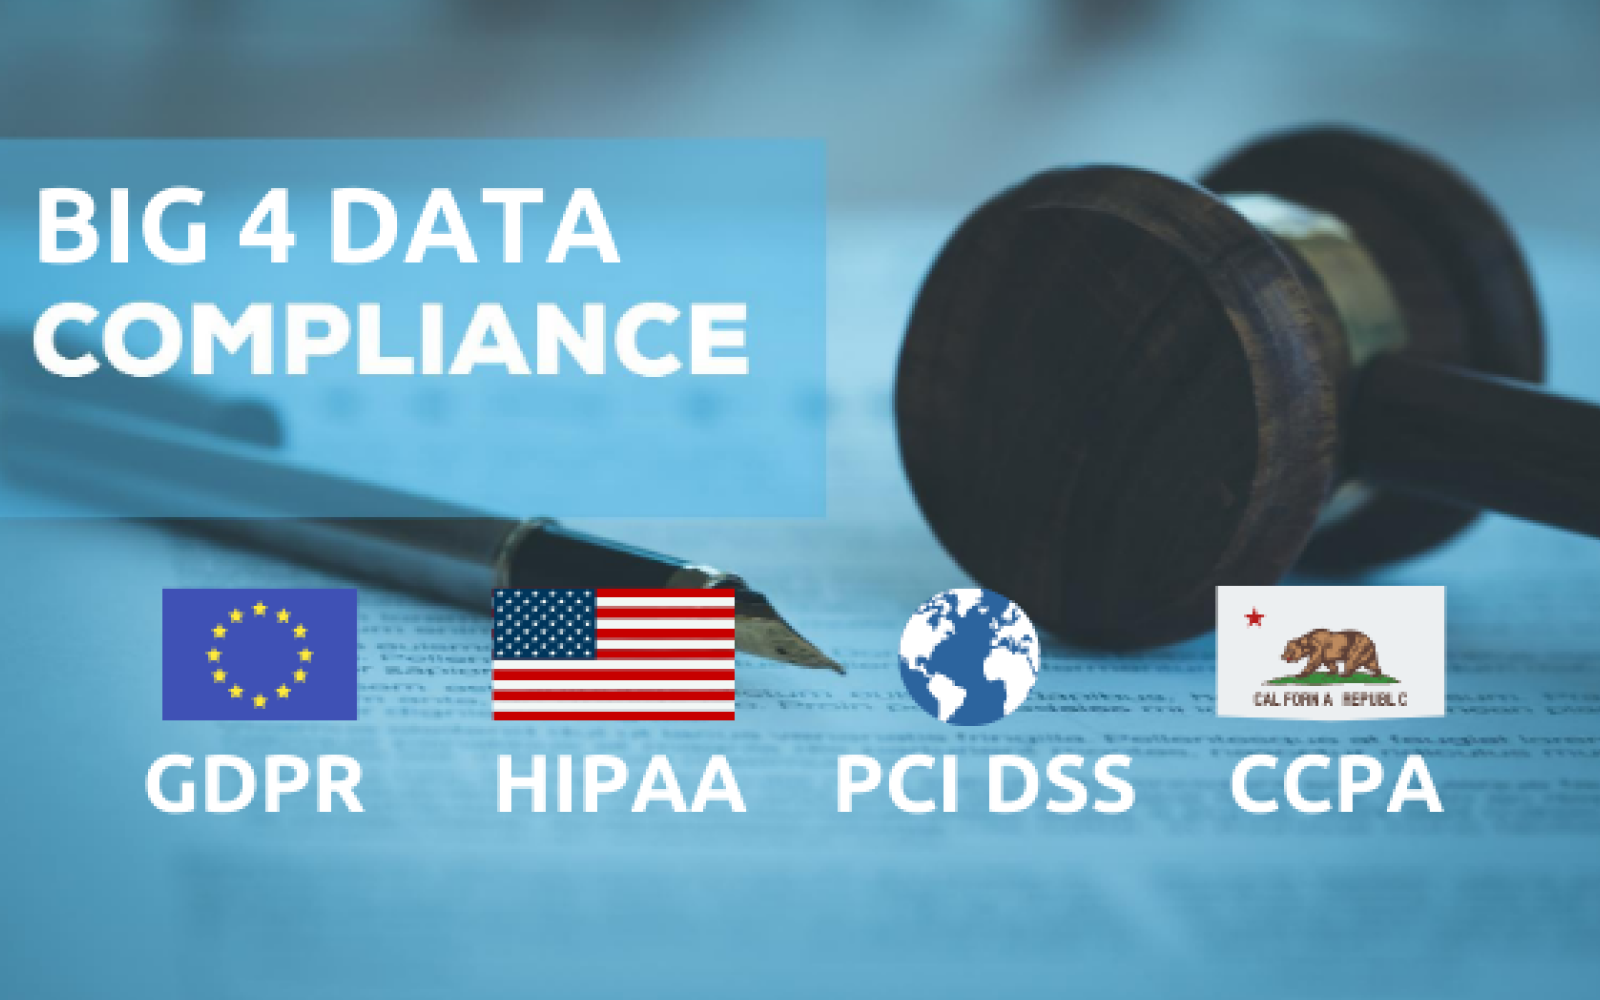
But if your run a medium to large company (or work in your company’s data security department, have been newly promoted to DPO, etc.), then chances are your business deals with one or more of the following regulations: GDPR, HIPAA, CCPA, PCI DSS, just to name a few.
To see if a sensitive data discovery tool is right for you, check out the “How To” guide below and get a better idea of how they work.
 Source: PentaSecurity
How To: Performing an In-House Audit
In this guide, you’ll learn:
- How to use a sensitive data discovery tool to uncover potential at-risk data.
- How to remediate any discoveries made.
For this example, we’ll be using PII Tools to illustrate all the steps of a successful internal audit.
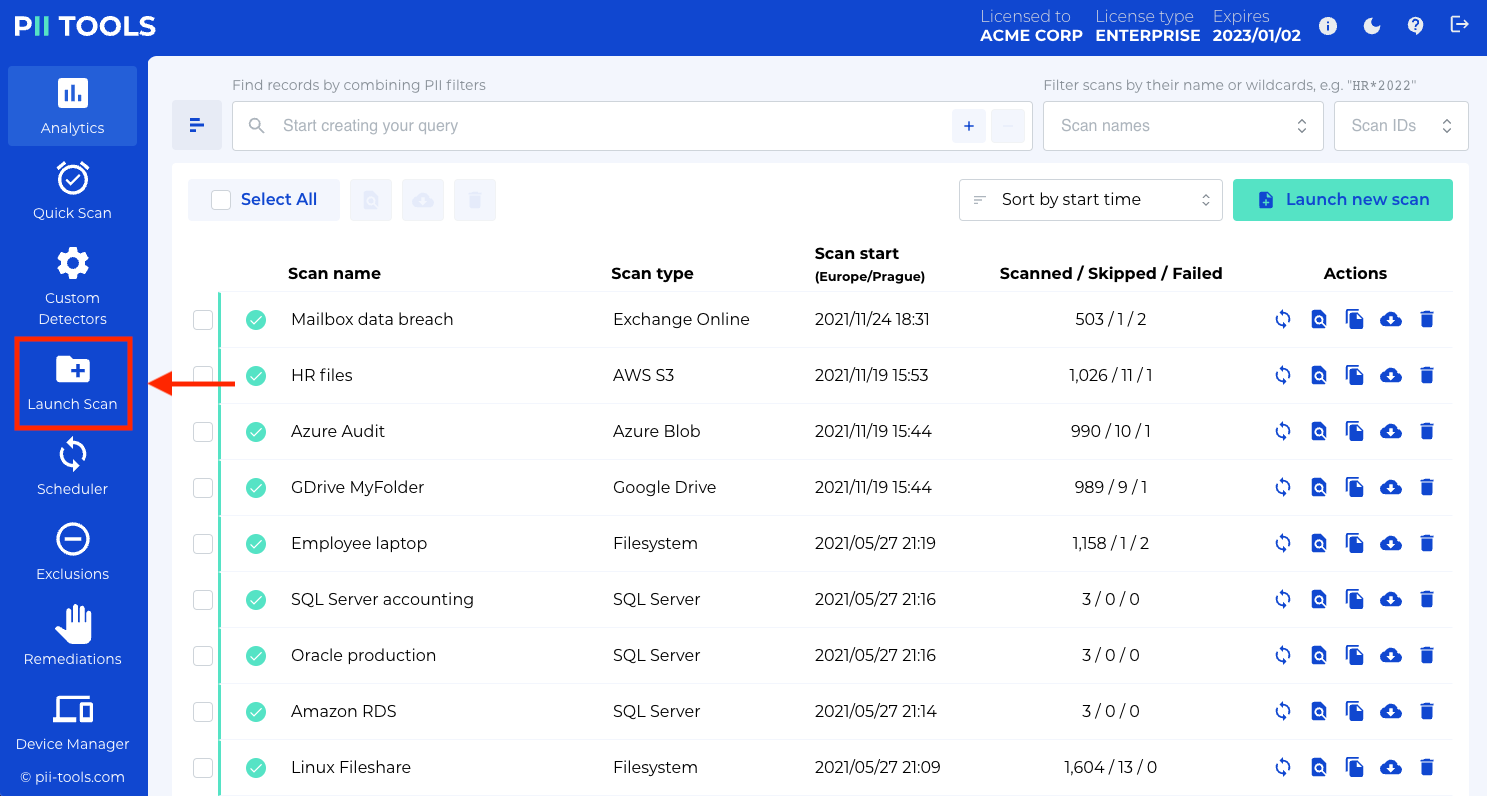
Step 1: LAUNCH A NEW SCAN
Here you see the PII Tools main dashboard. To launch a new scan, select Launch Scan.
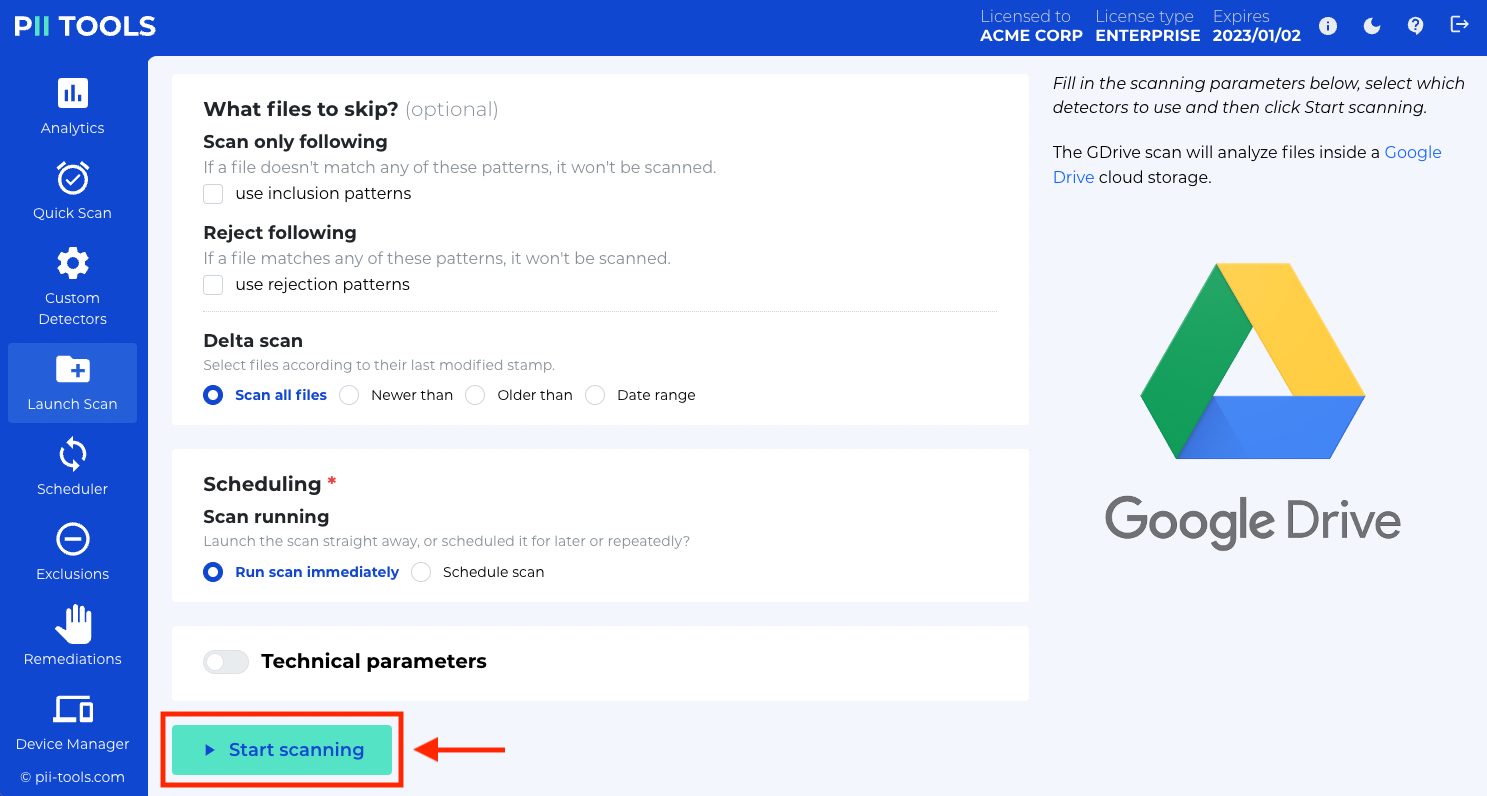
Step 2: PROVIDE THE SCANNING PARAMETERS
Your audit can be as detail-oriented as you want. Select all the parameters that match what you’re specifically looking for, then simply select Start Scanning.
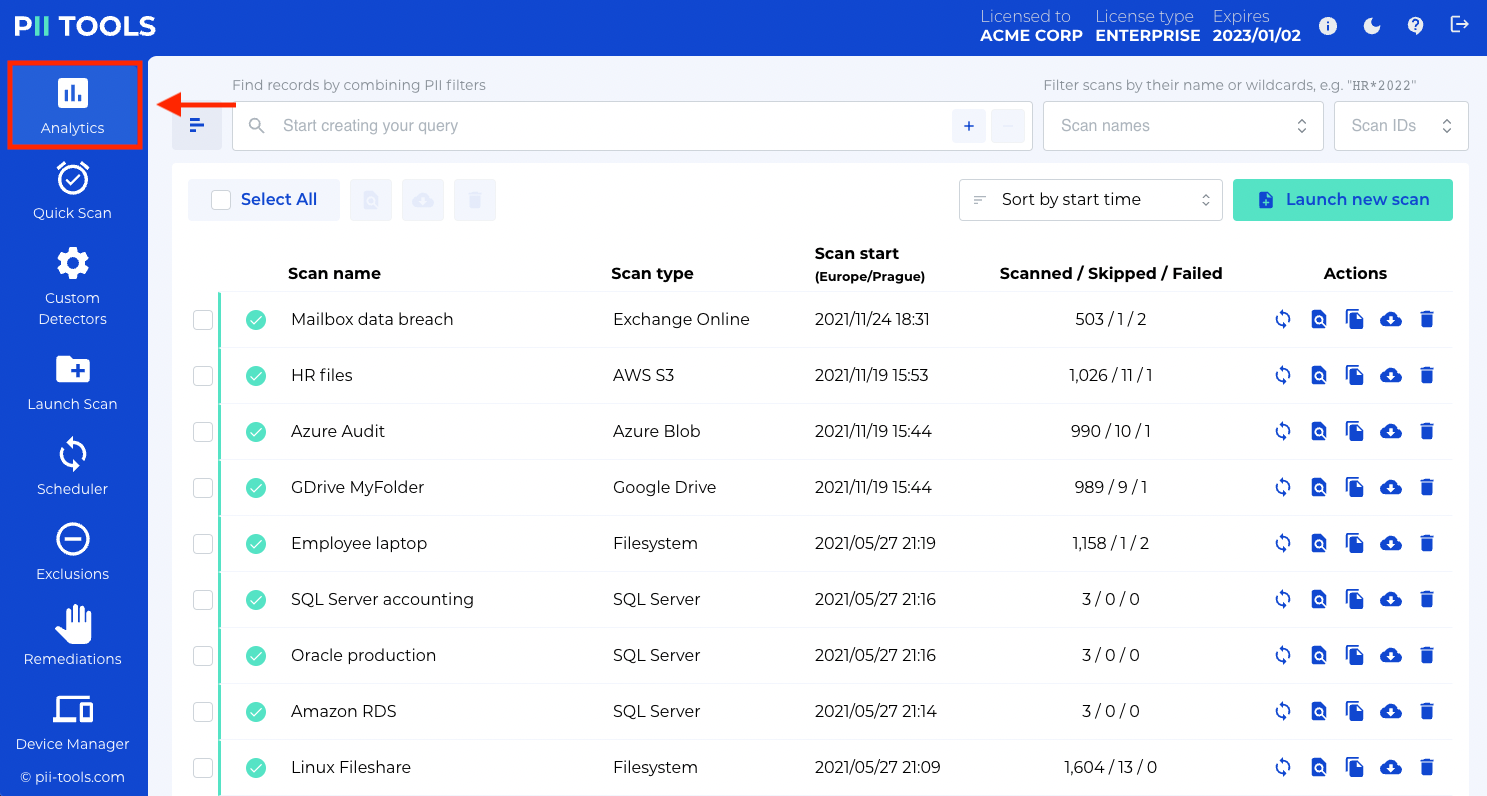
Step 3: REVIEW THE ANALYTICS TAB
Click the Analytics tab on the left-hand side of the help bar. When your scan is complete, this is where you’ll find the results.
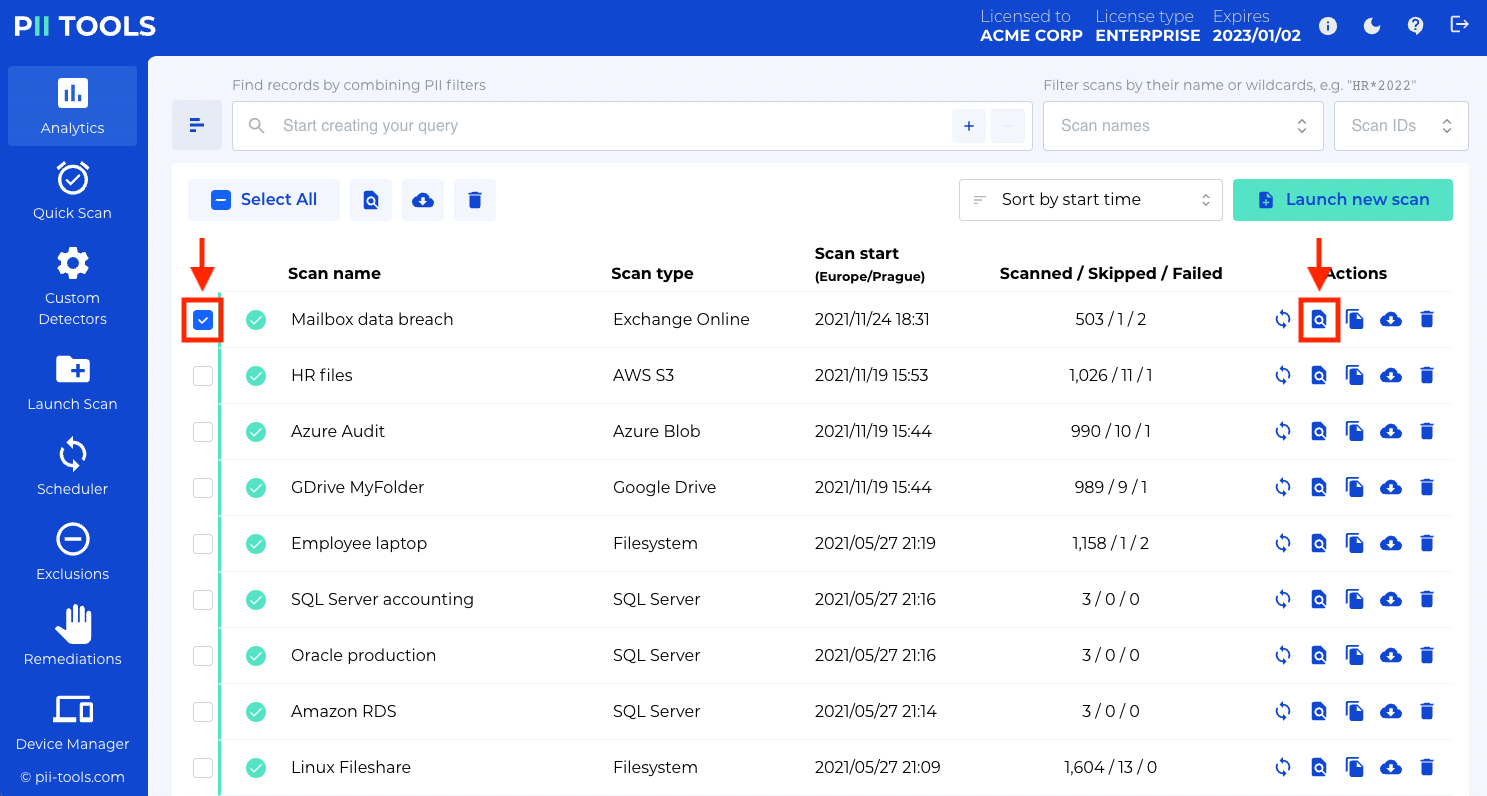
Step 4: SELECT YOUR SCAN FROM THE LIST
While on the Analytics page, find your scan from the list (it should be the top option, assuming it was the last scan you performed). Select the box next to the Scan Name, then click Browse objects of this scan.
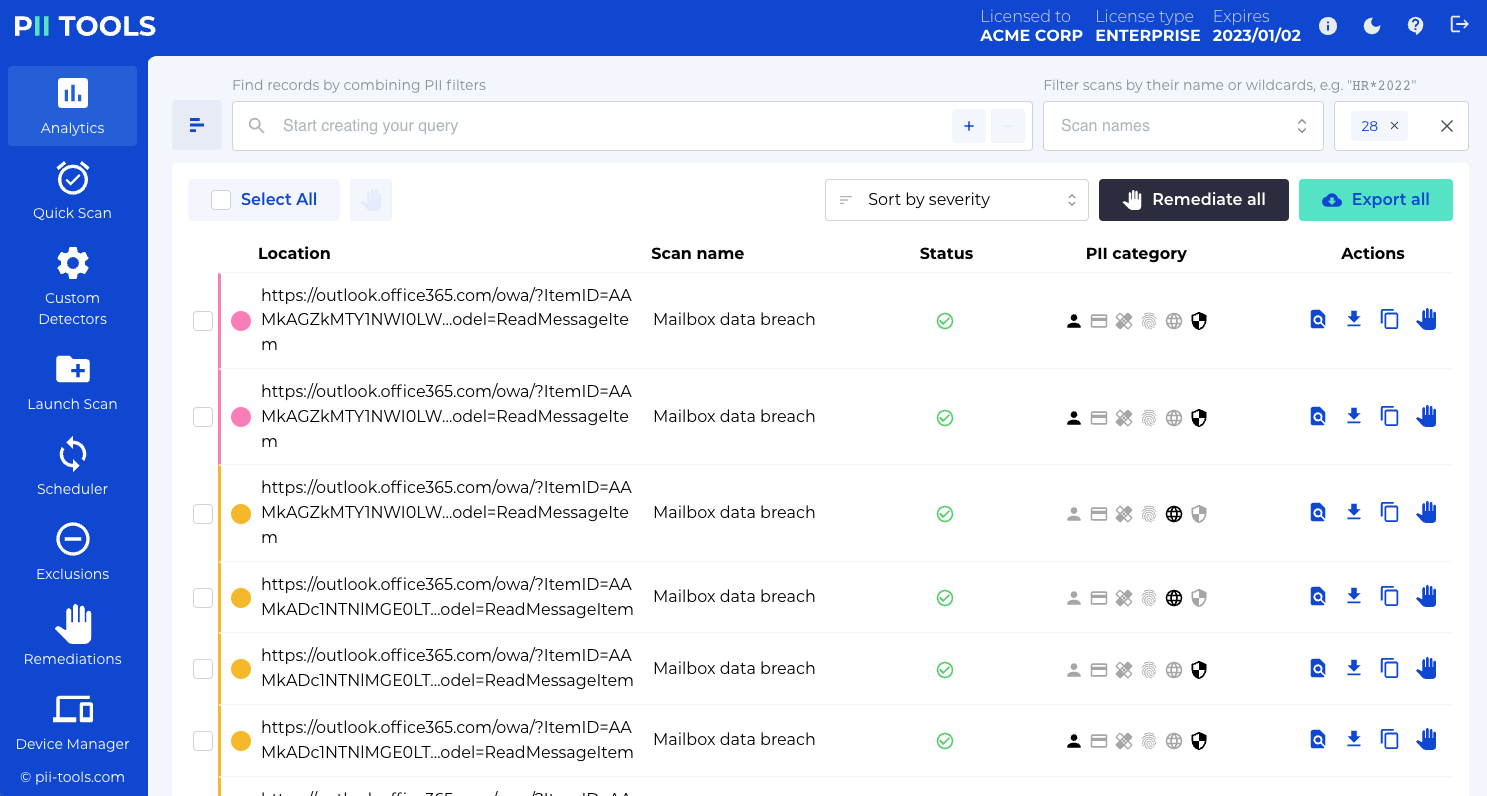
Step 5: REVIEW THE AT-RISK FILES
Here you’ll see every file that raised a flag during the scan, and they are color-coordinated by threat level (red = critical, yellow = high, green = low, blue = none).
Step 6: REMEDIATE
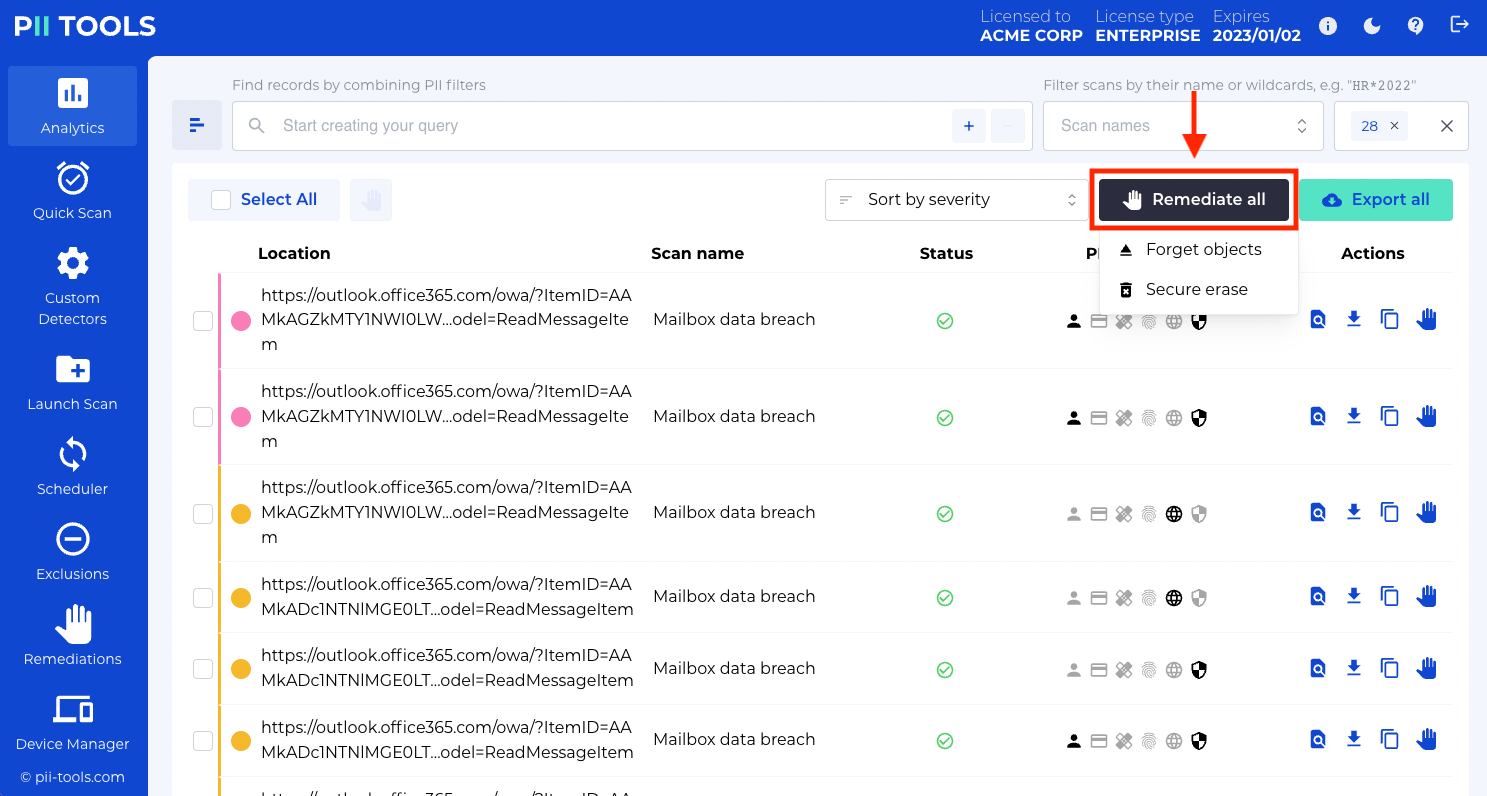
Check the boxes for every file you want to remediate. Then click Remediate All and choose to either forget or erase all the files you selected. “Forgetting” a file means permanently removing it from PII Tools, whereas with “erasing”, you have the option to quarantine the files to a designated folder to undergo further review or backup.
The Data Never Stops
So why would you want to perform regular in-house audits using a sensitive data discovery tool?
PII continues to pour in every day, and the only way to protect it is to store any regulation-applicable info in the right places (or delete it altogether if you shouldn’t have it in the first place).
That way, the next time a federal agency comes knocking at your door, like say, The Information Commissioner’s Office, you can easily prove that everything’s on the up and up.
In-House Audit Complete
And that’s all there is to it. Of course, PII Tools has many other useful features and options, like Quick Scan, Scheduler, Device Manager, etc., that you can become more familiar with later on.
But now that you’ve seen how easy it is to perform your own data audits using a sensitive data discovery tool, there shouldn’t be anything standing in your way from storing your data correctly. This is the best way to keep you, your company, employees, and clients on the right side of data security.
Who Ever Said Doing the Right Thing Needs to Be Hard?
Take the PII Tools Software Demo and Make In-House Audits Easier Than Ever!

