In this guide, you will learn how to create data leak reports with PII Tools.
Launching a scan
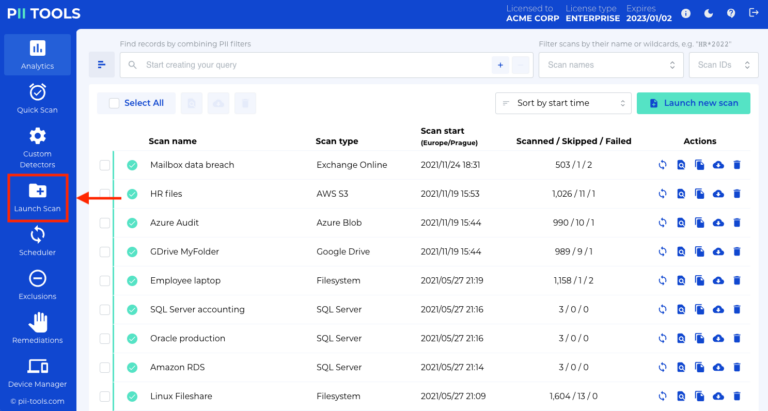
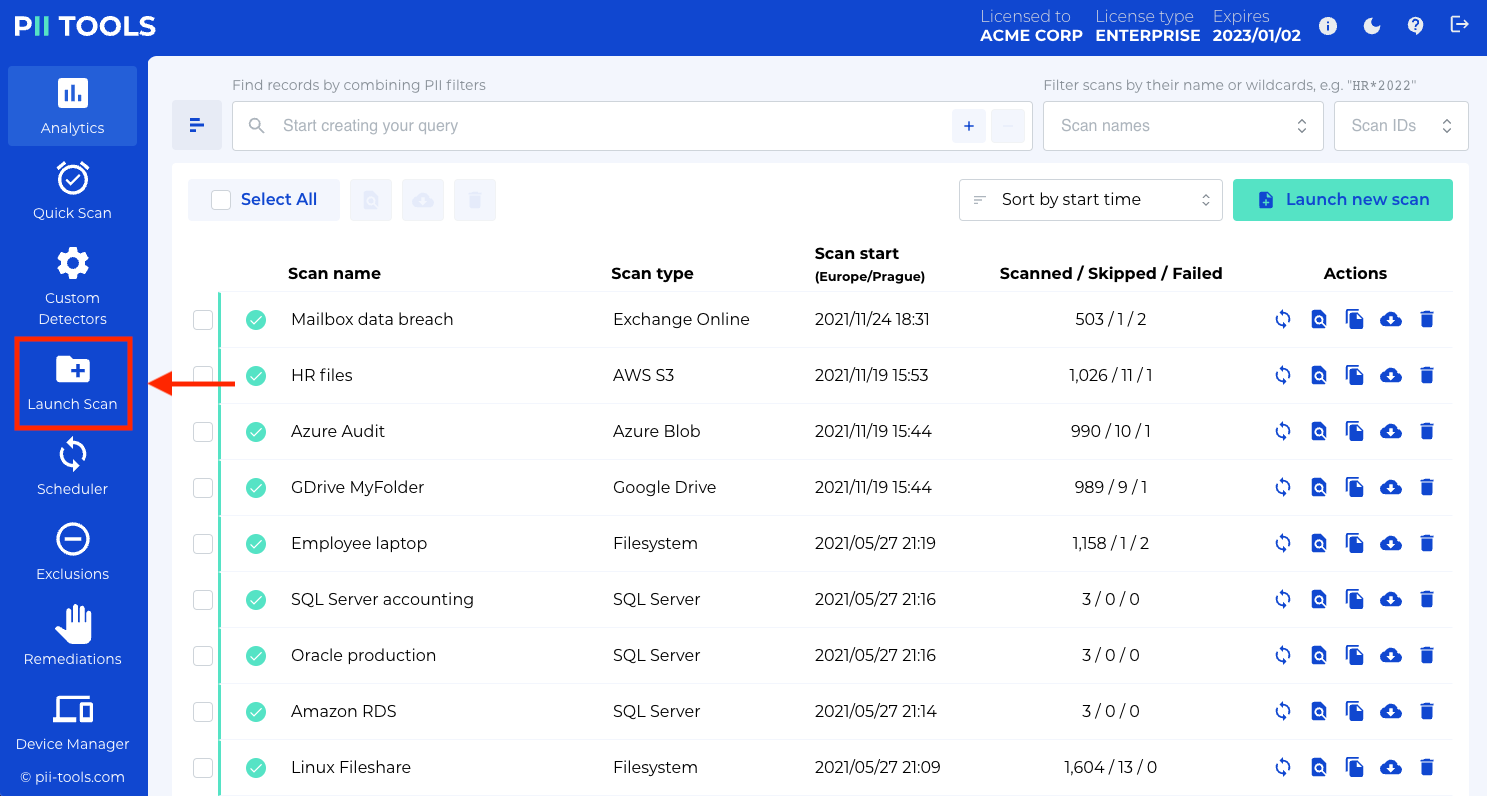
The first step towards the successful management of any data leak is to identify what was in the breached data. Open your PII Tools and, on the left side, select Launch Scan. If you performed the scan already, skip to the next section.
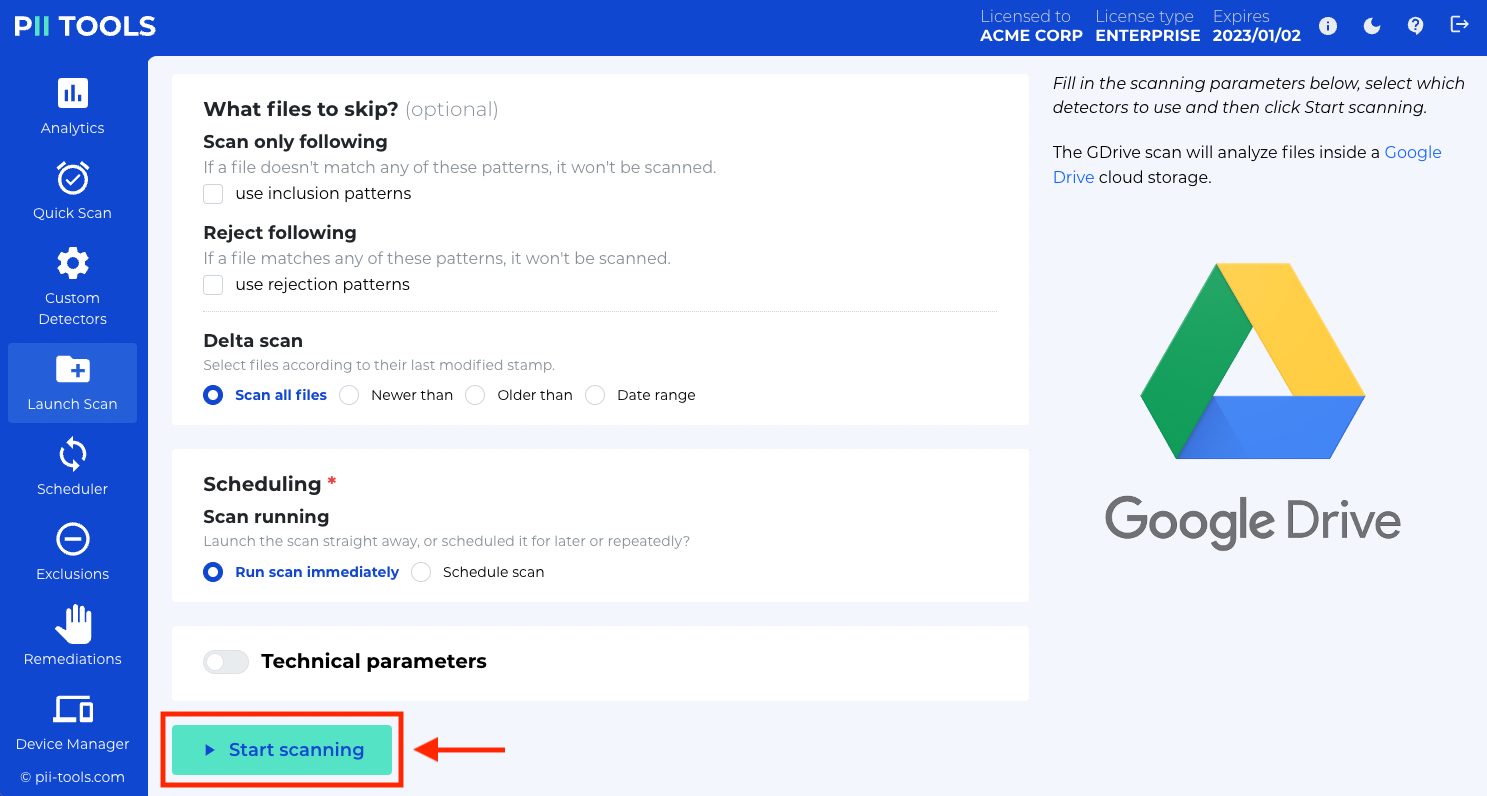
Select the compromised storages; fill out the necessary details, such as the server host and port, etc.; then click Start Scanning at the bottom of the window.
The scanning speed depends on the size of the storage and hardware you use to run PII Tools. To get the report as fast as possible, we recommend limiting the scan scope to only the affected storages.
Creating the data leak report
Once the scanning is complete, you can find the results in the Analytics tab.
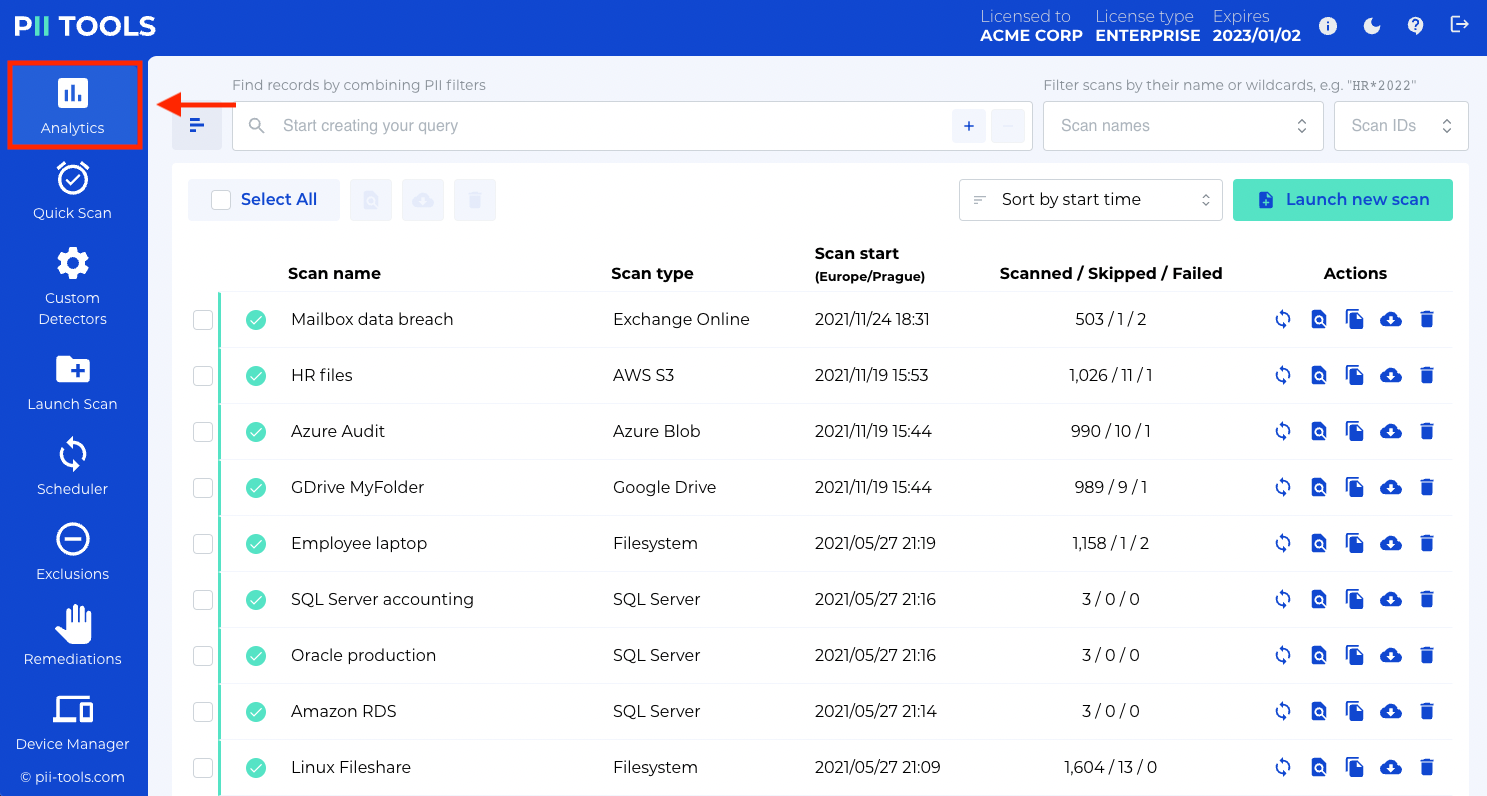
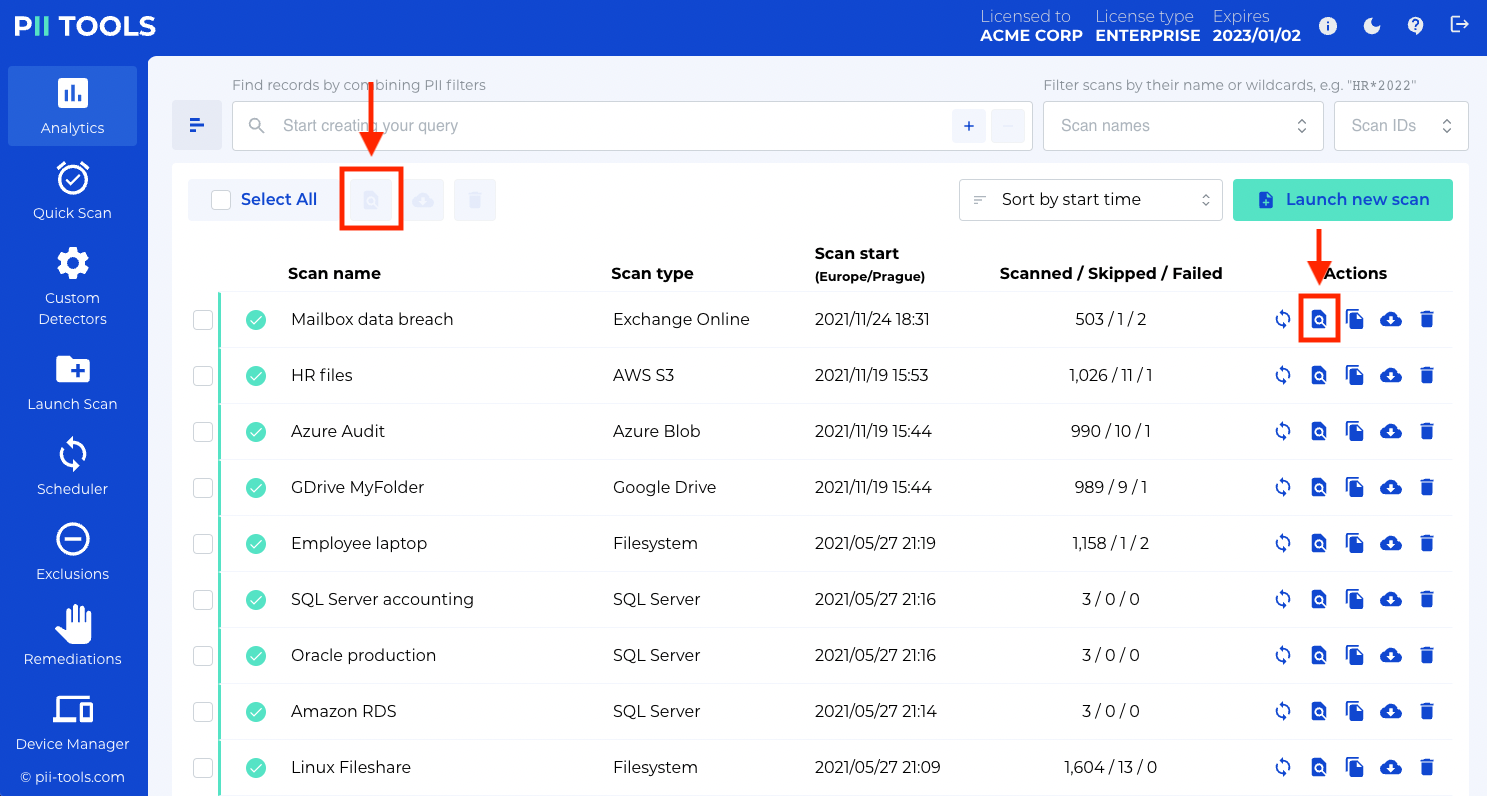
And from here, select the requested scan and click Browse objects of this scan at the top of the window, or to the right of the selected scan.
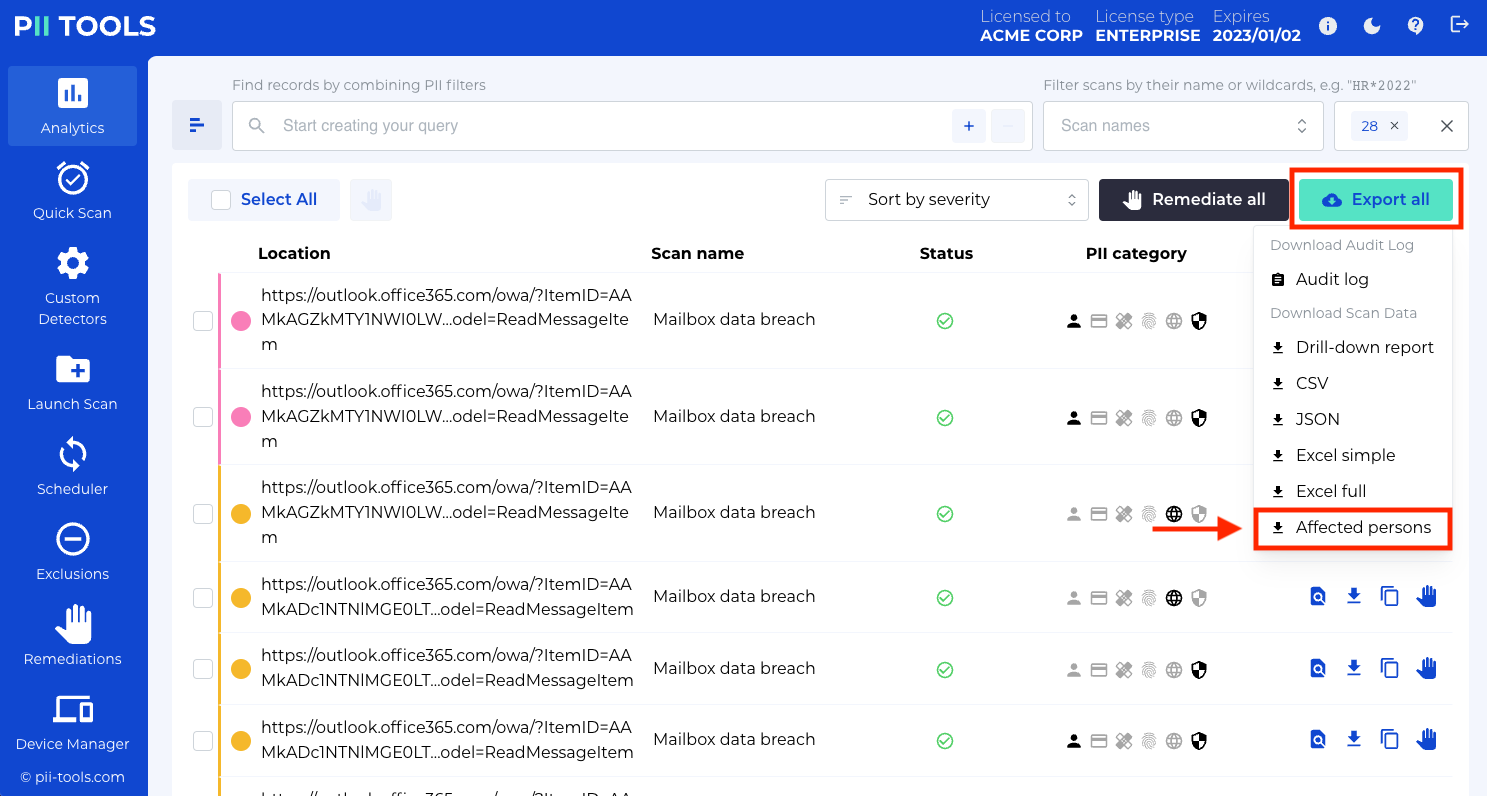
This will take you to the scan report page, which displays a list of every detected instance of PII. From here, click the Export All button and select Affected persons.
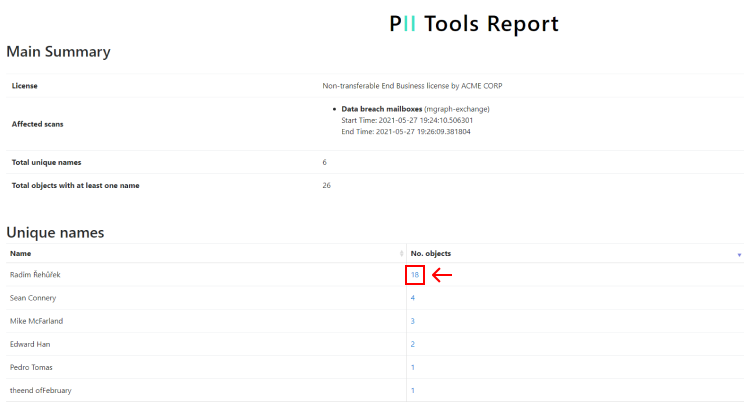
A ZIP folder will be downloaded containing an interactive HTML report. Extract the files, and open the index HTML document.

Now you see an interactive report showing all the affected people and their PII. This gives you a powerful tool to respond to data leaks.

How to read the report
Clicking on the number in the No. objects column…
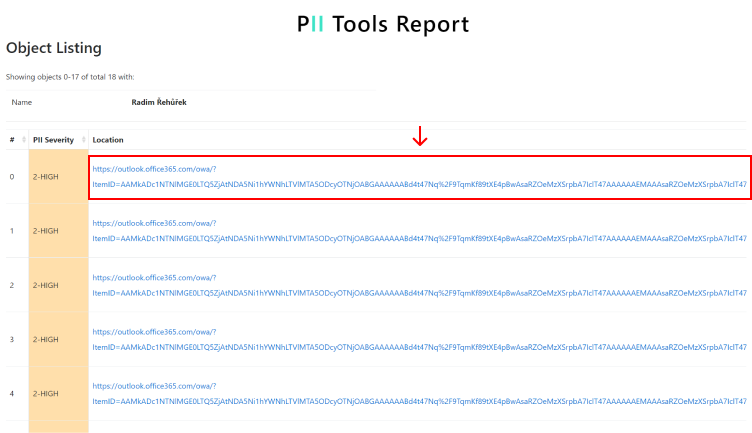
…will take you to the overview of all the files where the PII of that specific person was detected. To view all the details about a specific file, simply select it.
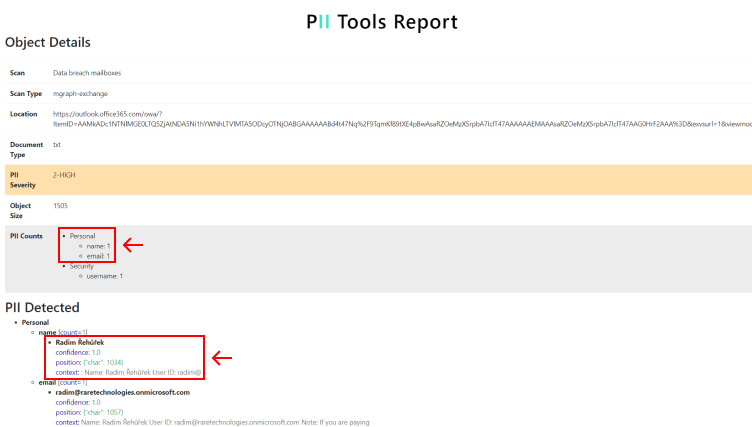
On the Object Details page, you see every PII instance in the selected file as well as its position and context. In this example, we see that in our selected PDF file, there are 28 unique personal names, and we see Jeff Z appears at the beginning. From the context shown we can deduce that he is probably a researcher at the Pan School of Computer Science.
The next actionable step
The interactive reports allow you to react faster to the breach, now you know exactly which people were affected and what data got leaked.
Where can you go from here?
- Get in touch with the people and authorities to inform them about the scope and severity of the incident.
- Immediately identify the precise locations in your environment for your security team to focus on in order to harden the InfoSec architecture and prevent future leaks.
- Notify your customers about the actions you have taken and work on rebuilding their trust.
Breach incident is no easy matter and the customer’s trust is hard to regain. Prove them and yourself that you have learnt from the past and work on not only securing your data, but also regularly scan their whereabouts. You can also download our Data Breach Prevention Checklist to make sure you have everything covered.
Explore all PII Tools’ features for Breach Incident Management.

